 |
TOUCH SCREEN | |
 |
After what has literally been months of "on and off" work with a final push over the last couple of months, I am very pleased to have finally completed my TOUCH SCREEN PROJECT.
What started as a simple idea has grown and evolved into the most complex piece of software I have ever written, totalling over 15200 lines of Visual Basic code.
The purpose of this endeavour was to have a user friendly touch interface containing several applications that would be useful in the kitchen and living area.
What you see in these pictures is actually the second rebuild of the software. The idea is that 4 applications can be opened simultaneously, showing their basic functionality. Then by selecting any open app, it extends into the lower window revealing its full functionality.
In researching the project, I looked to see what type of functionality other people had incorporated into their touch screen projects. Surprisingly there were only a few websites that went into much detail. I therefore add my project to those that were well documented. Please join me in a brief walkthrough of my project.
 |
CONSTRUCTION | |
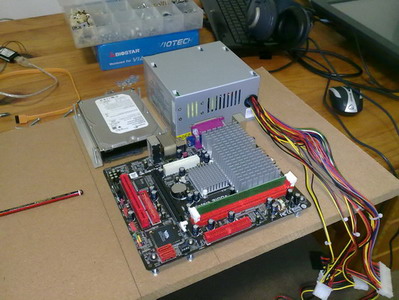
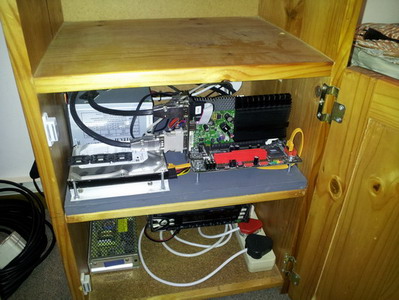
Firstly the PC.
I acquired a very decent little board from BioStar - the VioTech3100+ with integrated processor.
Thanks to Michael Scanlen for sourcing the board for me.
Onto this I added a dual output graphics card and a few PC peripherals.
I built the unit into a bedside cabinet that was vacant in the spare room.
 |
 |
 |
 |
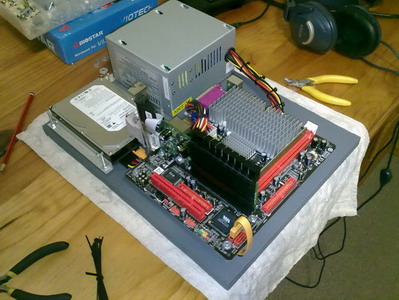
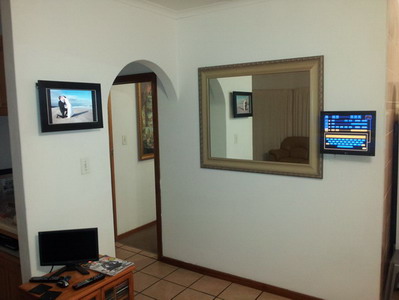
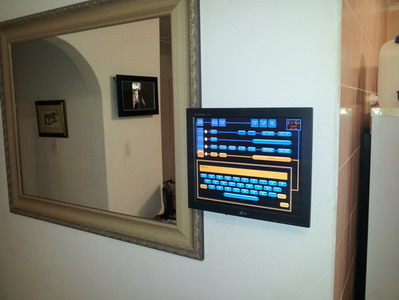
I then attached a 17 inch touch screen and a 19 inch photo framed monitor to the PC.
In a nutshell, that was the hardware completed.
 |
 |
|
SOFTWARE | |
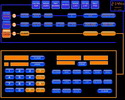
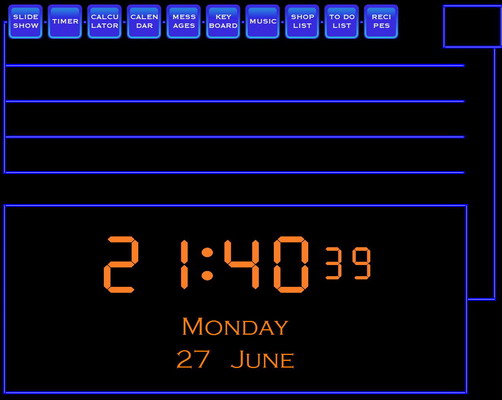
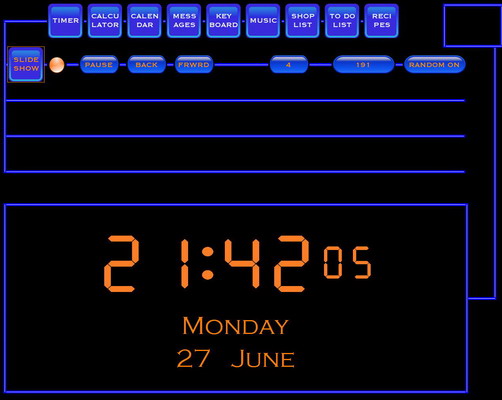
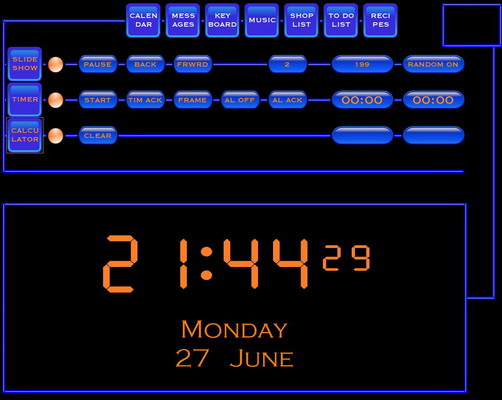
This is the opening view of the touch screen. It contains the applications on top in their dormant state.
Below are the four lines onto which the selected applications can open. Each app will open onto the next available line until all four are full. The time and date are read from Windows and displayed in the vacant lower window. When an application is selected from the 4 open ones, the time and date move up to the little window on the top right and the selected app opens up into the lower window.
Any movement on the screen is animated. If a button is pressed, it drops onto the next available line and runs to the left hand side of the screen. Its buttons then open and change colour in a fluid animated fashion. My apologies for not adding video demonstrating this.
The structure and animation on which the applications are built required over 3000 lines of code on its own.
 |
The first application is the Slide Show. To clarify: I have a monitor hanging on my wall built into a picture frame. This is used to display my photographs in the living room area. The slide show app allows me to control what is displayed in the frame. The frame monitor is connected to the same PC as the touch screen in a dual monitor configuration.
In this case the Slide Show button has been pressed. The button drops to the first available line and the primary buttons appear on the line. The circular orange button makes that application the primary, which extends it into the lower window.
 |
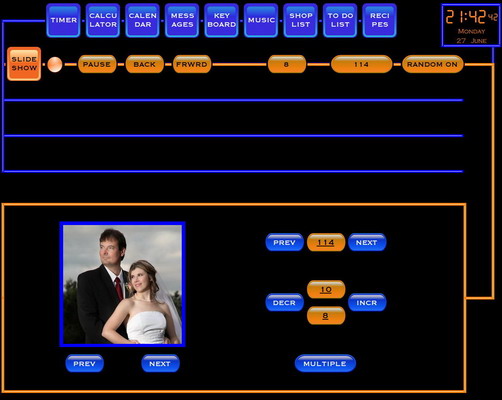
The Slide Show app has now been selected as the master. It extends into the lower window, allowing the user to access its full functionality.
The animated orange line joins the two to show which app is actually open.
I can now select which group of photos I want the frame to scroll through. I can also control the changing of the photos, either manually or automatically. Multiple photos can also be displayed on the frame.
 |
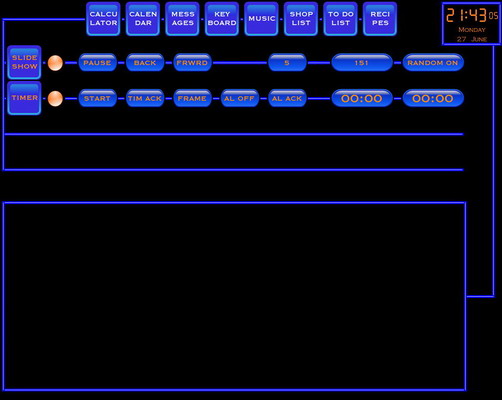
I have now closed the Slide Show app as master and opened an additional app which now runs concurrently with the first.
Left like this the time and date will make its way back down to the lower window until another app is selected as master.
The new app is the timer. Basic information is currently displayed.
 |
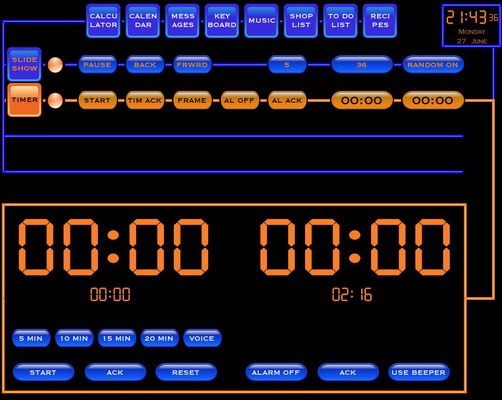
The Timer application is now selected as master.
On the left is a basic kitchen timer. Pressing on the digits allows the user to enter the required time. Alternately the presets below can be used. An audible voice can be selected to announce the time remaining as certain intervals. The small digits indicate what the actual time will be when the timer completes.
On the right is an alarm clock type timer which allows the user to enter the time of day that he wishes the alarm to go off at. The small digits indicate the remaining time.
 |
The Calculator app has now been added to the other open apps. The time and date has migrated back to the vacant lower window.
 |
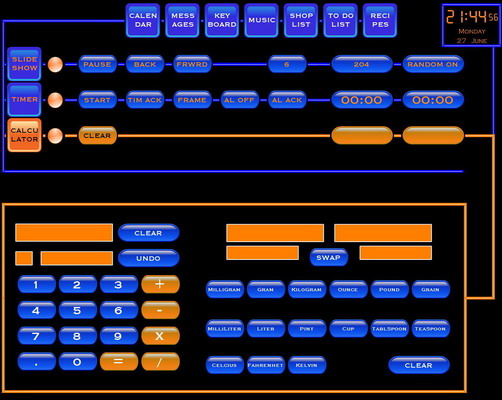
The Calculator has now been selected as master.
On the left is a standard calculator. On the right is a converter allowing the conversion of items likely to be used in the kitchen. Very useful when baking with imported recipe books
 |
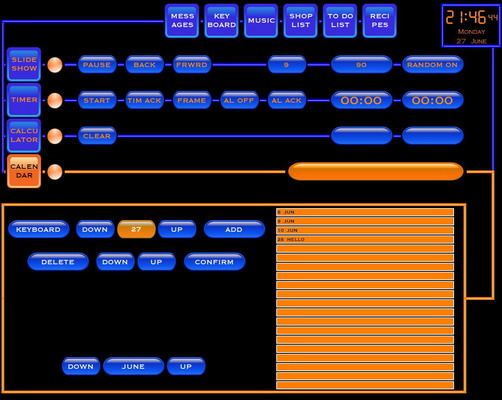
The Calendar app has now been opened and made master.
Entries can now be made on any month and are sorted into order of day upon addition.
These entries are written to text files on the hard drive, so that they don't disappear when the PC is restarted. If there is a valid entry on that day, the app will open at midnight and display the details on the elongated button.
 |
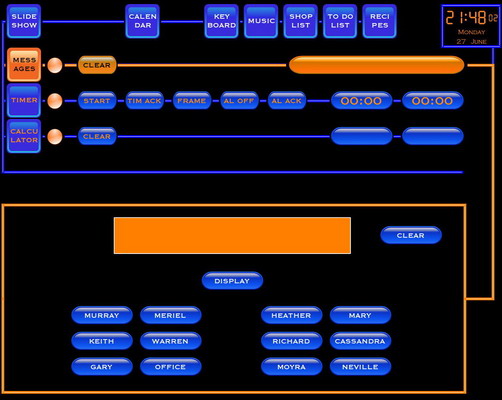
The Messages application is now displayed.
This has two parts.
Firstly, it can be used to display a message intended for another person in the house.
Secondly, it can send the message via email to the selected persons cell phone or PC.
The internet connectivity required to send the emails is achieved via wireless connection into my home network.
 |
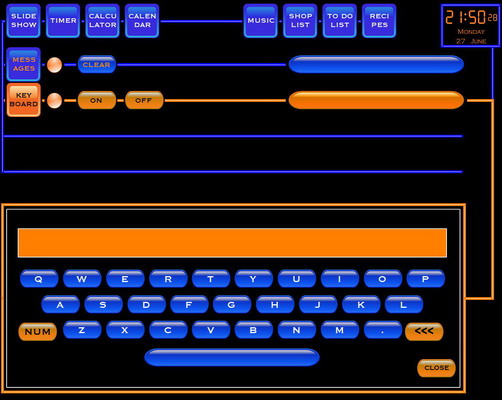
This is the Keyboard which can be activated from any other app requiring text to be entered.
 |
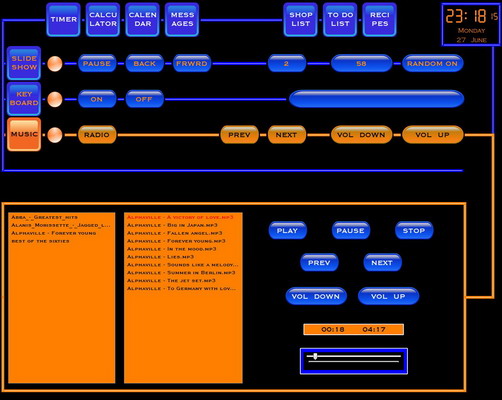
This is the Music app and was the most difficult to build.
It has the ability to play the fm radio through the PC or alternately select and play MP3s from the hard drive. I expect this will become the most used of all the apps.
 |
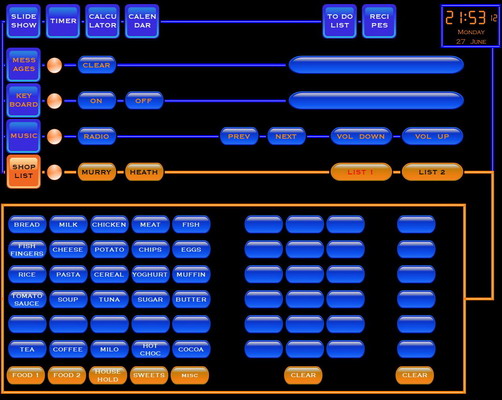
This is the Shopping List app.
It allows the user to select items from several menus and add them to one of two shopping lists.
When required, these shopping lists are emailed to the selected persons cell phone , thus allowing them to digitally and conveniently take the shopping list to the supermarket with them.
A surprisingly useful app.
 |
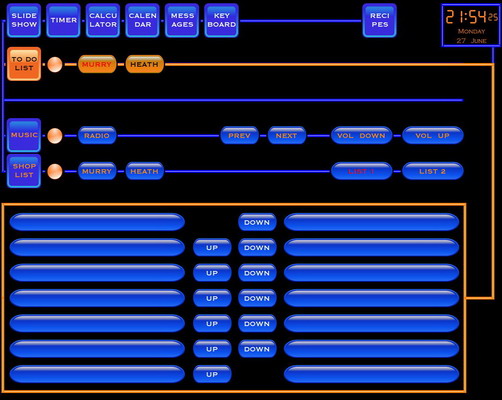
This is the ToDo List app.
It is a simple app allowing me to make note of things I want to remember to get done.
 |
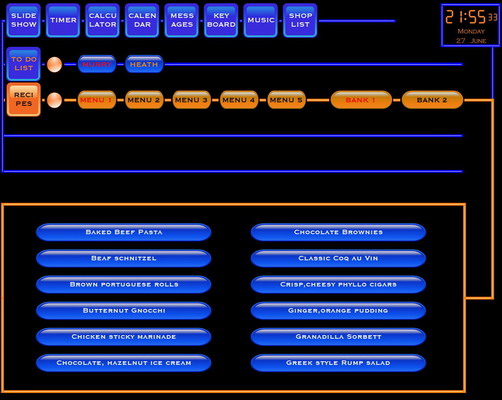
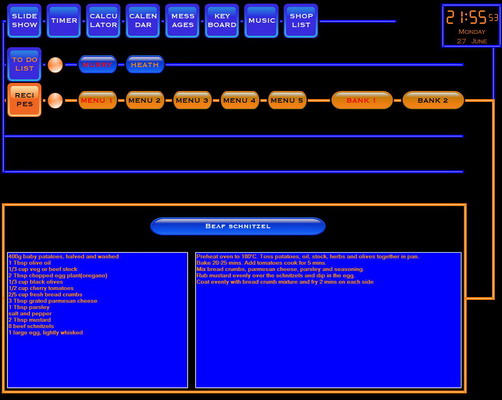
Lastly the Recipes app.
This a intended to store and display recipes for use in the kitchen.
A convenient digital recipe book, if you like.
There are several menus to select from. Once a recipe is selected, the screen changes to what you see below.
 |
The selected recipe is now displayed, showing the ingredients on the one side and the cooking method on the other.
 |
And that concludes the basic functionality of my Kitchen Touch Screen.
It is one of those projects that can simply continue to grow indefinitely, so I have decided to draw the line here and move on to my next project.
Thanks to my wife for being patient with me as this was a time consuming project.
Thank you for visiting my corner of the world. Please feel free to take a look at other items of interest on my website.