 |
FEATURE WALL | |
One night my wife and I were throwing a few ideas around regarding the TV wall in our new lounge.
We wanted something that was a little neater and more refined.
And something that hid the wiring to the television and the speakers.
While still formulating a plan we bounced the idea off our friend Gary Swartz.
He had a few suggestions of his own.
One was to build a false wall and recess the TV into it.
At first I didn't take the idea too seriously as it entailed a lot of work.
But the more I thought about it, the more sense it made.
I present a brief pictorial of what pursued.
Apologies for the quality of the photographs which were taken by cellphone.
 |
As I had never put up a false wall before, the project began with a phone call to my brother in Knysna.
As he has experience building everything from mezzanine floors to fine furniture to river boats he was able to give me a few valuable pointers.
Then began the work.
As I did not take time off work for this, it took four weeks to complete. Building in the evenings and over the weekends.
Additionally, I decided that if I was going to go to this much effort I may as well paint the place as well.
So I painted the lounge, kitchen, entrance and staircase. Walls and ceilings.
And changed all the light fittings.
Amazing how a job always grows bigger than originally intended.
But I digress.
 |
 |
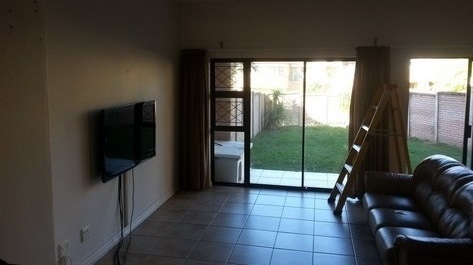
Like most wall mounted panel TVs, my Samsung stood proud of the wall. The cabling was ducted in visible conduit and the plug sockets were exposed.
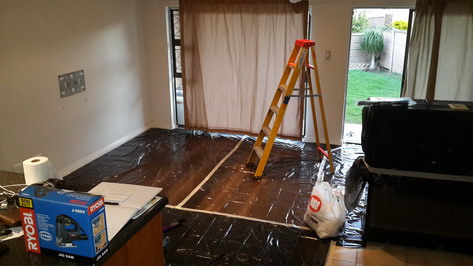
So It began.
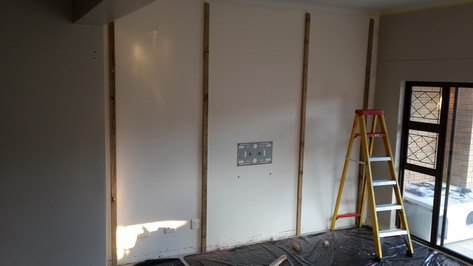
The floor was protected and the wall was stripped bare.
 |
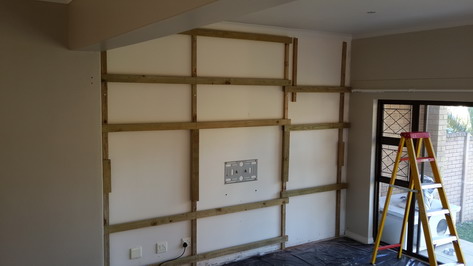 |
First the uprights are anchored into the wall. Many anchors are used as this timber will hold the entire weight of the structure.
Then the cross pieces are fastened to the uprights. The panels will attach to these. It may look a little untidy, but at this point strength and functionality are more important.
 |
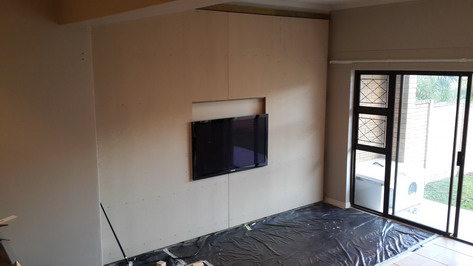 |
The left panel is screwed into place. The TV hole has been carefully pre-cut. Careful measuring is key. The panel is 22mm chip board.
Here we see the second panel fitted. The gap above the TV is there to allow it to be dropped into its bracket. It will get its own panel later.
 |
 |
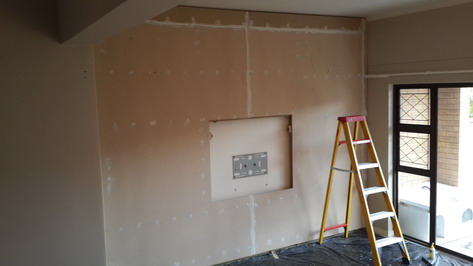
The remaining panels are fitted. Then the joins and the screw holes are filled in.
The undercoat is now applied.
 |
 |
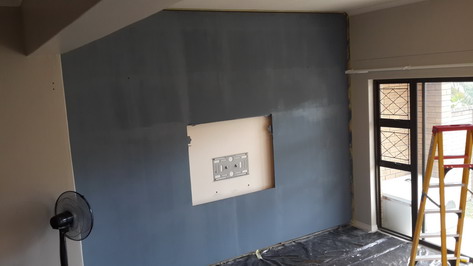
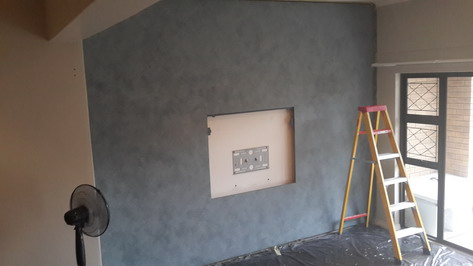
The final coat of speciality paint is now applied. Barely visible are the magnetic brackets that will secure the panel above the TV.
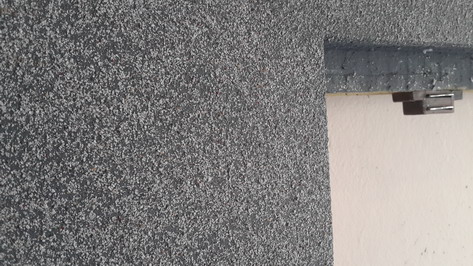
My wife selected a very attractive speciality paint which is applied like a thick porridge and produces a finish similar to that of very rough sand paper.
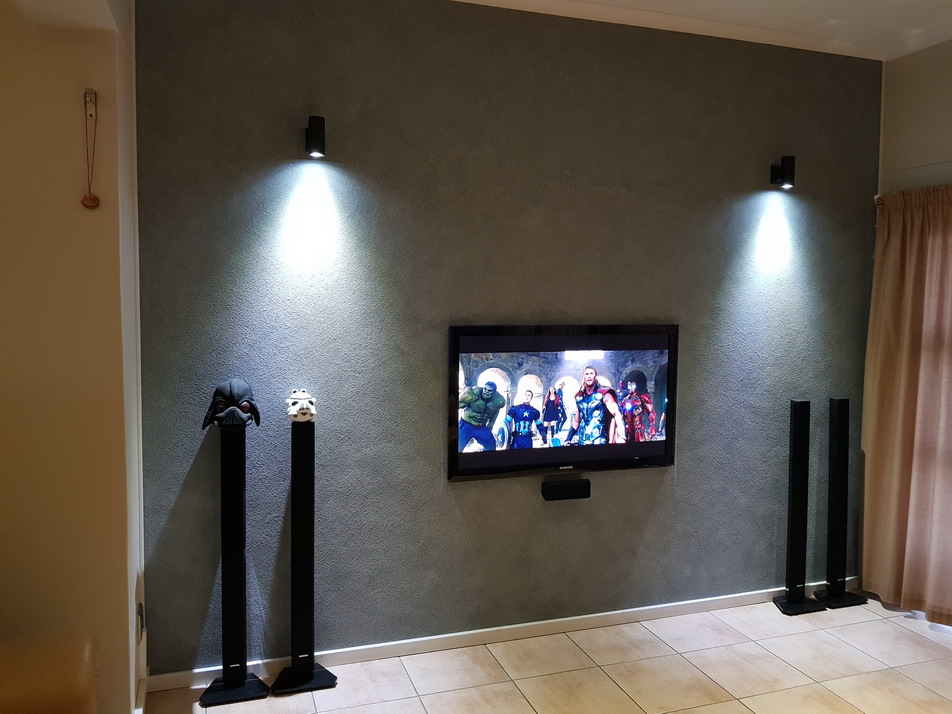 |
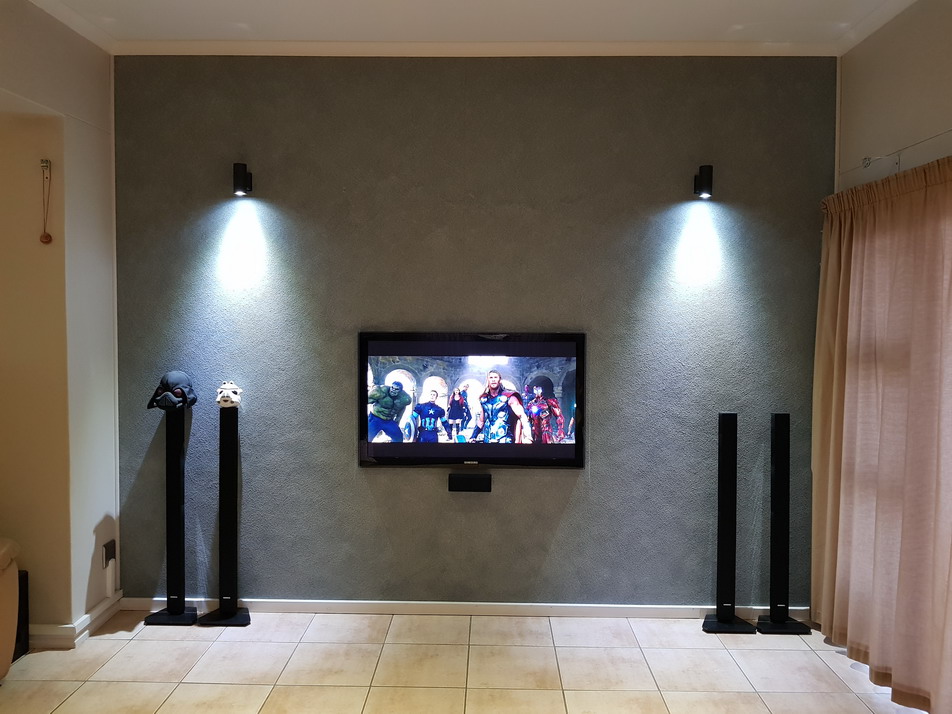
The TV was installed.
Then the lights were fitted and the speakers were placed.
Skirting, cornicing and other trim were installed to make the false wall appear to be the real wall.
All cabling is hidden and ducted out to the PC hidden in the kitchen.
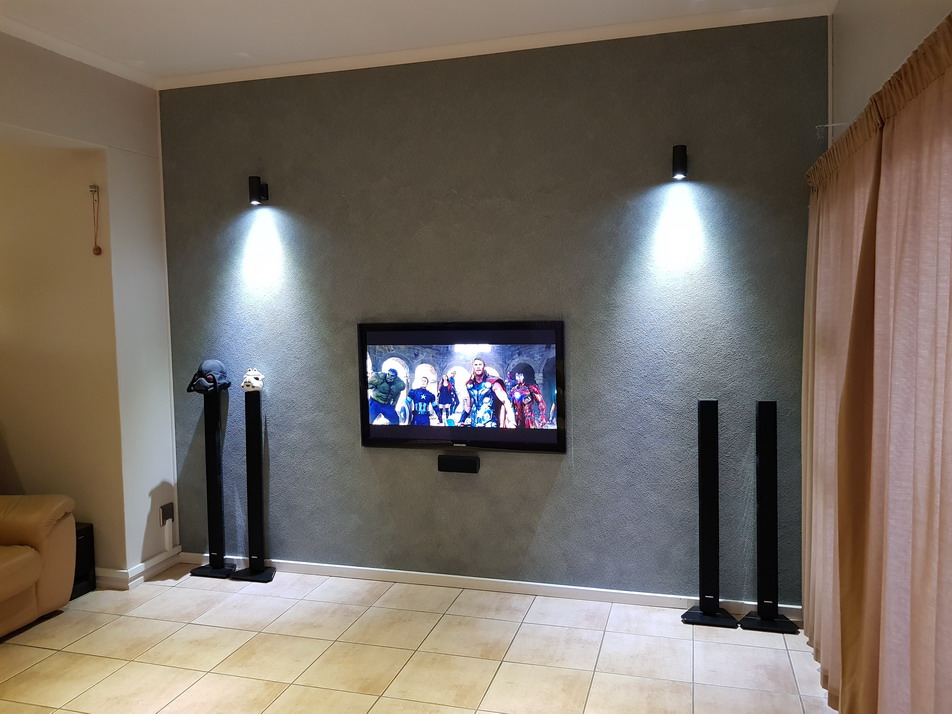 |
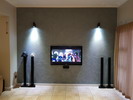
I am very pleased with the outcome.
It gives the room a very clean and refined look.
Thank you for visiting.
Please feel free to take a look at a few other projects on my site.